Subscribe with us Online

Subscribe with us eTeachingMe A full online Curriculum for parents, and anyone like, who have babies, toddlers, and preschoolers. Where we "make time meaningful again" at home or anywhere, easily! www.eteachingme.com
Showing posts with label toddlers. Show all posts

Thursday, April 21, 2016

Food and Learning?

Food and Learning?

by Kristin Miller on 04/18/16
Yes - we love learning with food.  I mean, come on, how many times growing up were you allowed to paint with your yogurt???  Super fun!

From painting with our applesauce and ketchup, to smearing our yogurt, coloring on tortillas, learning the colors with our fruit loops cereal, scooping up rice, and making letters with our cheese and crackers.  There are endless opportunities to learn using food.  It is so practical and easy; and the best thing, the kids LOVE it (because they get to eat their "homework" - literally!)

5 Foods to Easily Learn with at Any Home:
1. Tortilla or Bread - Have your child build their fine-motor skills to tear the pieces apart.  Then, color on them!

2.  Thick Liquids or Foods as Sauce (Ketchup, Yogurt, Applesauce, Mustard, Jelly, ect) - Just for some messy fun, let your child finger-paint (or use a paintbrush) to smear these fun sauces around on thick white paper!


3. Foods you can Cook (spaghetti noodles, rice, ect.) - After they have cooled off, throw some noodles in a bucket (or rice).  Give your child a cup, fork, and a spoon to stir.  Creative imagination and pretend play will be sure to keep your child busy as they make some spaghetti or rice for you!


4. Snack Time Foods - Like crackers and cubed cheese - Use these to teach tons of learning skills, like letters, numbers, counting, and making shapes.  Check out our other blog post specifically for ideas HERE.  

5. Breakfast Time Foods - Using a variety of cereals to teach learning concepts, such as colors, counting, making letters, and using to build fine-motor skills and literacy awareness!
- See more at: http://www.eteachingme.com/Mom-Blog.html?entry=food-and-learning#sthash.yvSzqBTg.dpuf

Tuesday, March 25, 2014

Learning with Home-Made Tools

Teachers, parents, and nannies .... teaching your child is easy and interactive with this "outside of the box" thoughtful idea!  You can vary it in many different unique ways, for any age, to teach multiple concepts, anywhere at anytime!

Watch our Videos for an interactive experience of HOW-TO TEACH this Lesson Plan 

Video 1

Video 2

Lesson Plan:  Learning Literacy using Home-Made Tools

Age Range - 1 to 5 years old
Cognitive Learning Focus Areas:  Literacy, Math, Language development, Early reading readiness, Fine-motor skills, Hand-eye coordination
Author:  Kristin Miller, M. Ed. Founder www.eteachingme.com 

Materials needed:
Paper towel roll
Black magic marker
Long white art paper (or poster board) cut into strips (about 1 1/2 feet long and 1 inch wide)

What to do:
1. PARENTS ONLY - Pre-Create the "Language Tool" before teaching lesson to child.   Using a knife (to start the square holes) and then scissors, cut 4 squares out on one side of a paper towel roll.
2. Cut long strips of paper (about 1 1/2 feet in length and 1 inch wide) out.  Multiple strips desired for however many learning concepts you wish to teach.
2. Create "language strips" by writing different teaching concepts on each strip.  See ideas below for what to create and teach child.
3. Line up the strips of paper, following the same length apart as the 4 square holes on the paper towel roll, and write whatever concept you want your child to learn in that same spot.  Do so in a way that when the child pulls the paper through to "read" what's inside each hole, they can see what is written through the holes easily, so that it all measures up accurately.  See pictures as an example.
4. Sit with your child and learn together; using different "language strips" to teach specific concepts.
5. Let your child put the "language strips" in the paper towel roll, and "learn freely" to teach you what they may see in the holes, or you help guide child to teach the concepts.

Ideas for "Language Strips":
* Alphabet letters to build words
* Numbers
* Shapes
* Sentence - story telling pictures and/or words combine
* Sequence of event pictures
* Child's letters in their name
* Emotion pictures
* Colors
* Counting amounts (# of dots for children to count)


Wednesday, November 6, 2013

TRACING? 10 Creative Ways to Teach...

Tracing is a beginning skill that kids need to and can learn around age 2 to help with early writing and fine-motor development.  Below are some helpful activity ideas to help you teach tracing skills to your toddler and preschooler.  The KEY when teaching tracing - to make it easy on their eyes and make it engaging so they WANT to do it!  All 10 of these activities below will help you do just that .... AND the best part, they are all AFFORDABLE and EASY to prepare!

1. USE A HIGHLIGHTER TO TEACH TRACING - Using a highlighter shows children "one continuous line" - therefore, makes it easier for them to follow along and less stimulating as those "dotted tracing letters workbooks".  When you ask them to "trace" - Say a simple phrase they would understand, such as, "can you follow along the yellow lines with your marker?"  Always show and model for them what it is you want them to do, before expecting a child to do it on their own (for the first time).


2. USE CLEAR TAPE TO TEACH TRACING - Have your child use their finger or a marker to follow along the clear tape on a colored sheet of paper (for easy viewing).


3. USE PLASTIC COOKIE CUTTERS TO TEACH TRACING - Have your child use their finger to follow the outline of the cookie cutter.  Then, have them put the cookie cutter down on white paper, and use a marker to trace its outline.


4. USE GLUE TO TEACH TRACING  - Help your child use liquid glue to trace the outlines of letters, lines, or shapes on a sheet of paper.


5. USE PAINT TO TEACH TRACING LINES - Have your child use a paint brush and paint to trace lines, or letters, you have drawn out on a sheet of white paper using a highlighter, as shown below.


6. USE PAPERCLIPS TO TEACH TRACING - Have your child use a pen and paperclips to trace their outlines.


7. USE YOUR CHILD'S HAND TO TEACH TRACING - Have your child trace the outline of their hands, feet, or your hands on a sheet of white paper or the sidewalk with chalk.


8. USE CHALK TO TEACH TRACING - Write your child's name with a piece of white sidewalk chalk outside, have them use colored chalk to trace over it!  You can also substitute by having them use a paintbrush with water to trace over the letters written in chalk, as a form of "erasing it!"  FUN!


9. USE HOMEMADE PATTERN SHEETS TO TEACH TRACING - Create some fun, different pattern sheets (have them laminated at the local Office Depot) and give your child a dry erase marker.  Have them "trace" or follow the patterns on the sheets, like shown in the picture below!


10. USE POPSICLE STICKS TO TRACE PLAY DOUGH LETTERS - Create letters in play dough, then have your child use Popsicle sticks to stick in the play dough following the letters outlines.  View in picture below!

Monday, July 8, 2013

10 Ways to use Play Dough for Learning

Ever wonder how you can use play dough to learn with your child? Here is a list of verbs to use when teaching your infant, toddler, or preschooler.  Below this list are 10 FUN and EASY ways to use play dough as a learning tool, as well!  Enjoy...and we love sharing ideas, if you have an interesting way to use play dough for learning with your child, please tell us in a comment below!

10 Ways to use Play Dough as a Learning Tool:


1. Use it to make big and small balls, teaching the concept of size.

2. Make creatures out of it and have your child (or you for an infant) use describing words to explain what you created, why, and its characteristics such as color, size, and features!
3. Use play dough to make shapes!

4. Use play dough to make letters!


5. Use play dough to spell out your child's name and teach them the letters in it!

6. Use play dough to teach colors.

7. Use play dough to teach sorting skills.
8. Use a ball and play dough to flatten out, building hand-eye coordination and motor skills.

9. Use play dough to practice tracing letters!


10.  Allow child to free-play with play dough; play is how learning occurs!


Wednesday, June 5, 2013

4 Ways to Raise Prosperous Children

My son will be three and a half on July 14th.  We enrolled him in Karate lessons about a month ago.  Best choice made to date.  Some may think, "at 3 years old that is kind of a hard concept for them to grasp and takes a lot of hand-eye coordination skills, not to mention listening and patience."  Guess what?  Yes it does...and there's nothing wrong with that!  We love it...and for a 3 year old, perfect!  He does great too, and looks stinkin' cute!


His karate instructor, Master Culin, is outstanding.  Structured, positive, guiding, and most importantly, a true role-model.  He teaches many words of wisdom to parents about how to raise and prepare successful children that do take lessons for "life", that I thought would be nice to share with the world.

Decisions:  The sum total of everything we do in our lives.   "The true "self-defense" that we should teach our children should be summed up as giving our children the tools to make better "decisions" in their lives."


4 Ways to Raise Prosperous Children

True Knowledge from the Karate Master himself

Written in part by:  Mr. Joseph Culin, Chief Master Instructor, ACMA Certified

1.  Understand what "self-defense" is to teach our children how to defend themselves in life.  "Real self-defense is protecting our kid against potential hazards that happen daily."  Below are several types of self-defense we need to monitor and equip our children with the knowledge to keep them safer in life.

* Drug self-defense
* Alcohol self-defense
* Bully self-defense
* Tobacco self-defense
* Emotional self-defense
* Peer-pressure self-defense
* Intimidation self-defense
* Procrastination self-defense
* Mediocrity self-defense
* Physical self-defense
* And the list goes on and on...

2.  The power of forced habits!  Good or bad, beginning at birth, habits are forced on us.  Such as brushing our teeth, not talking to strangers, or eating good food.  When you are forced into a habit, it sticks with you. We have to "make a habit of safety."  "It is important to take the time to instill new habits that our children will have for life."  I love this quote Master Culin says in his Karate booklet about forcing our kids into good habits.  He quotes:

"When I was younger, I didn't want to go to swim lessons and threw a tantrum.  My mom literally had to restrain me in the car.  She FORCED me to learn this new habit and not give in to my complaints.  Her brilliant words:  "LISTEN YOUNG MAN, I ALMOST DROWNED SO I AM MAKING YOU GO TO YOUR SWIM LESSON.  YOU WILL THANK ME SOME DAY. NOW, I CAN BE YOUR FRIEND OR I CAN BE YOUR PARENT.  I CHOOSE TO BE YOUR PARENT AND MAKE YOU GO. HOWEVER, WHEN YOU ARE 20, 30, AND 40 YEARS OLD, WE'LL HAVE PLENTY OF TIME TO BE FRIENDS."

Genius words I think.

3.  "Successful people do things that the unsuccessful people won't!  Most people go home at night, turn on the TV and engaged in activities that don't help shape their futures.  They engaged in TENSION RELIEVING rather than GOAL SETTING activities."  Teach your child to have a goal, do it, and stick with it beginning at an early age.  Like 3, going to Karate class!

4. Action is the key!  "Persistence on a worthy goal will bring opportunities in front of you, but it is ACTION that will pull them in your life and make them yours!"  

Wednesday, May 22, 2013

My child BITES! What do I do???

Yes, this is a true statement in our family! My daughter, who is 19 months, loves to BITE!  When she is upset or frustrated, watch out!  Our son, who is now 3 and 1/2 never had this "agenda" to bite.  This is ALL new for us as parents to deal with, and may I say, it is a hard thing to break a young child of doing.

You are not alone parents!  I will give you a few different simple techniques and tips to help your child learn that biting is not a good choice, and how to redirect them so that biting is no longer an option!


Causes of Biting:

Biting is usually a discovery learning technique that begins around 1 year of age.  It is during the time of teething and "everything in their mouth" stage which are both normal behaviors.  For children with minimal verbal skills, certain triggers (such as a child being frustrated because another child took their toy away) make biting a primitive form of communication for young children.  After 2-3 years of age, it then becomes a deliberate learned behavior.  It is best to stop and prevent it from happening early and at the beginning stages.

A Few Tips:


Step 1:  Establish a RULE.  Whenever you see your child biting, always redirect using words to explain. Parent would say:  "We do not bite.  That hurts people. We only bite food."

Step 2:  Remove the child who is the biter away from the situation.  Redirect as necessary.

Step 3:  Always be consistent in your approach to redirecting your child when biting occurs.  State to child "it is not a good choice, we do not bite, it hurts people," and begin engaging them in something else to redirect their attention from what, or who, they were wanting to bite.

Step 4:  If they have a urge to always want to bite, give them a teething toy that is dedicated for them to use to bite on when they are feeling the need to bite.

Step 5:  Show them that biting hurts.  Kids learn through experience and their senses.  Therefore, biting is a way of learning for them.  Feeling what biting is will help a young child learn that "the experience" of biting may not be desirable anymore. Model how biting hurts on yourself.

Step 6:  Build their vocabulary.  While saying "we do not bite" as you are correcting your child from biting someone or something that should not be, touch their mouth with your finger so they can learn through senses that the word "bite" means "using their mouths."  You can also show your child (modeling) what "biting" is by making your mouth do the motion while you are saying "no bite."

Step 7:  Give consequences.  As your child gets a little older (2 and up), and they are still wanting to bite, set an expectation that if they are to bite someone or something they are not supposed to, they will be given a consequence such as time-out (1 minute per age of child) or they will have to leave the play-date because they were biting their friends.

Step 8:  Do not worry!  Most children do grow out of the habit of biting by 3 years of age, if not earlier.  As mentioned before, biting is a way for a young child to learn and experience.  They do not have the comprehension at such a young age to understand that their actions (biting) causes hurtful reactions (mark, bruise, or breaking of the skin on someone).

Step 9:  Prevention:  The best time to stop a biting behavior from becoming a habit is when it first starts.  Be sure not to laugh when he/she bites and that no one treats it like a game.  Never give-in to your child's demands because of biting.

JUST REMEMBER THE MOST IMPORTANT TIP TO REDIRECTING A BITER:  Always teach them WHY we do not bite (it is not a good choice) and HOW it feels (it hurts).  For a young child consistently hearing and learning these two things, will help their process of growth to understand the negative consequences behind biting.

Wednesday, April 17, 2013

How does your child grasp???


Stages of Pencil Grasp

By: Kristin Miller, M. Ed. in Curriculum and Instruction

CEO/Founder eTeachingMe

First we need to understand that at every stage, every child is different and will develop at a variety of rates.  It is important to continue to work with your child at each stage of pencil grasp development, do not worry if they meet the "common grasp stage" or not; consistency is key to helping any child learn and grow!  Please enjoy reading, and keep up the hard work parents, as your child develops at their own pace, and own unique capabilities!

1.  READ:  Fine and Gross Motor Development Chart so you can have a clear understanding of expectations for your child's age.

 2.  Please view the Development Stages of Pencil Grasp chart below.  This gives you a basic understanding of what to work on and expect out of your child at each developmental stage.

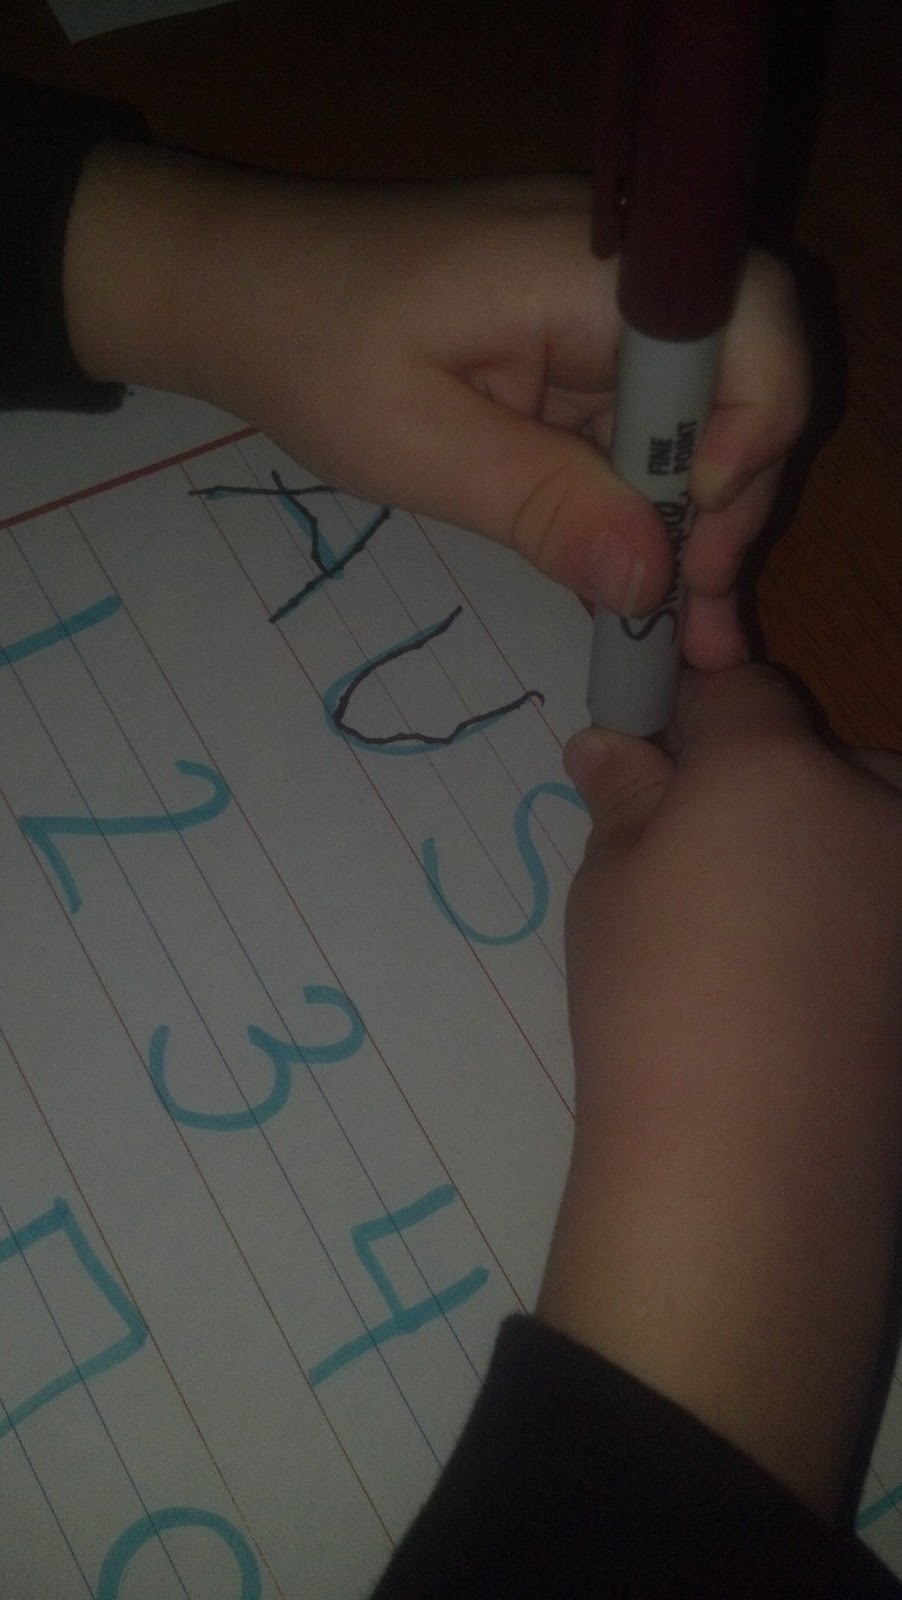
 3. View the picture examples of my children below, you can see what is normal and relate it to the basic understanding of where your child is at in their pencil grasp development.  This helps you to see first hand, what to expect.  

Pre-Toddler Stage
Infant - Fisted Grasp
1 years old
 
Pre-Toddler Stage
Full Fisted Grasp
2 years old

Toddler Stage
Palmer Grasp
Grasps with hand and moves with elbow
2 1/2 years

Immature 5-Finger Grasp
Preschool Stage
3 years old


Pre-Kindergarten Stage
Mature 3-Finger Grasp
Starting to use and develop
3 1/2 years old